

My mom is guest posting today. I hope that you will read this! It has me super inspired!
Tabitha was telling me last Friday that she was at the store buying some gum and other things for a leprechaun hunt to celebrate St. Patty’s Day as a family. Toni tells me in church on Sunday evening that Reed had to go and get Anna’s offering for our new building because she was so excited about giving to our new WEC location. And it occurred to me that this post should be about the benefits of making memories with your children.
Good memories are important to me. They represent fun times. We always went to Lake Gaston in the summer. We always welcomed loads and loads of kids in our home. We had traditions like Christmas Eve parties with family and friends. Ray’s mom read to them every day. I played with them in the floor. We laughed a lot. Ray took them anywhere and everywhere. My memories are the special times we had together as a family.
Memories are powerful for marking a moment. Who gave you your first kiss? Where were you during 9/11? What exactly was that feeling that God gave you the moment after you gave birth? For the brain, it’s called encoding….It’s the stuff that stays in the brain without practice, association, mnemonics, and all the other things that help us remember. Adding to a child’s autobiographical story (with great memories) helps them to understand their world and make connections to new learning. It, simply stated, increases comprehension because it adds to their “data bank” of information in a quick and easy way. The best teachers that I’ve met are committed to “hands-on” learning, giving children opportunities to experience an idea….make a memory….mark a moment.
But, that’s not all. There is research that supports the concept that (Memory Lane and Morality: How Childhood Memories Promote Prosocial Behavior by Gino & Desai, 2011) adult behavior is actually strongly influenced by nostalgic memories. This research indicated that adults were more helpful and more giving to others. Who wouldn’t want that for their child?
Toni and Tabitha do not always remember the small details. It’s just like thinking back to 9/11 and realizing that even though we will never forget the event, some of the details are not encoded in our memory. Sometimes they remember details that I’ve forgotten but, in the end the, results are the same. They are selfless adults and I’m proud of how they “turned out.” I’m going to bet their childhood memories had something to do with that.
So, your challenge is to mark your calendar with at least one “purposeful” memory each month. Share what you are doing and anticipate great things as a result.

 I was inspired to make a balloon arch from this website. I think that she did a fabulous job! So, I have included both the link and I have also included her instructions on my website. Again, these are not my instructions...but I did follow them to get my balloon banners. So, they are tried and true! Why mess with perfection, right?
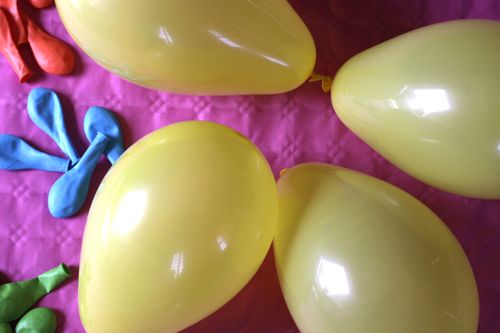
1) Start by grouping balloons in to groups of 4. We used rainbow colors, but using all the same color, or lots of different shades of blue would be neat too.

2) Blow up each set of 4 balloons and tie the ends. No need for helium, your own lungs should do the trick. Do your best to get the balloons fairly equal in size.
3) Thread some good twine (I used a waxed kitchen twine) on a big needle — upholstery size is perfect. Technically, a small needle would work too, you just need the eye to be big enough to pass the twine through. (From TAB-I used a doll needle in the sewing section and this made it really easy. I also just used embroidery thread because it is all that I had.)
4) Pass the needle through the tail of all 4 balloons in your set. Be careful — needles are known for popping balloons. : )
5) Slide the balloons to the end of the string and trim off threaded needle and remaining length (you’ll use them to thread the next set of balloons). Leave a 2 or 3 inch tail on either side of the 4 threaded balloons.
6) Cinch the four balloons together and use a square knot (right over left, left over right) to keep them nice and tight.
7) Do the same thing for all your sets of 4. For our banner, we made 18 sets of 4. Three sets of 6 colors.
8) When you have all your sets made, thread the needle again, but don’t trim the thread from the spool.
9) Pass the needle through the center of a balloon set. Use the point to go through at least of couple of the balloon ends so that the set is secure on the twine.
10) Use the needle to add another balloon set, push each set along the twine at intervals of 5 or 6 inches. If you’re going for the same rainbow look we used, you’ll thread all the red sets first, then all the orange sets, then all the yellow sets, etc.
11) Keep adding sets with the needle and sliding them along the twine till you’ve completed your banner. Leave a long tail of twine on either side of the balloons so that you can tie the banner to a wall or arch or window. Then cut the twine from the spool.
The banner is so light that it’s easy to hang. We used push pins in the wall and then wrapped the twine around the push pins.


